I like things very neat! I’m the designated “cleaner” in the family, and that practice extends to my game collection too. Not only is it important to maintain your games, but like I mentioned in my practical game collecting in 2021 post, you can save money buying old carts in rough shape! So how do you get your cartridges nice and minty looking? I’m here to help! Here are a few of my tried and true tips for cleaning game cartridges.

This post may contain affiliate links
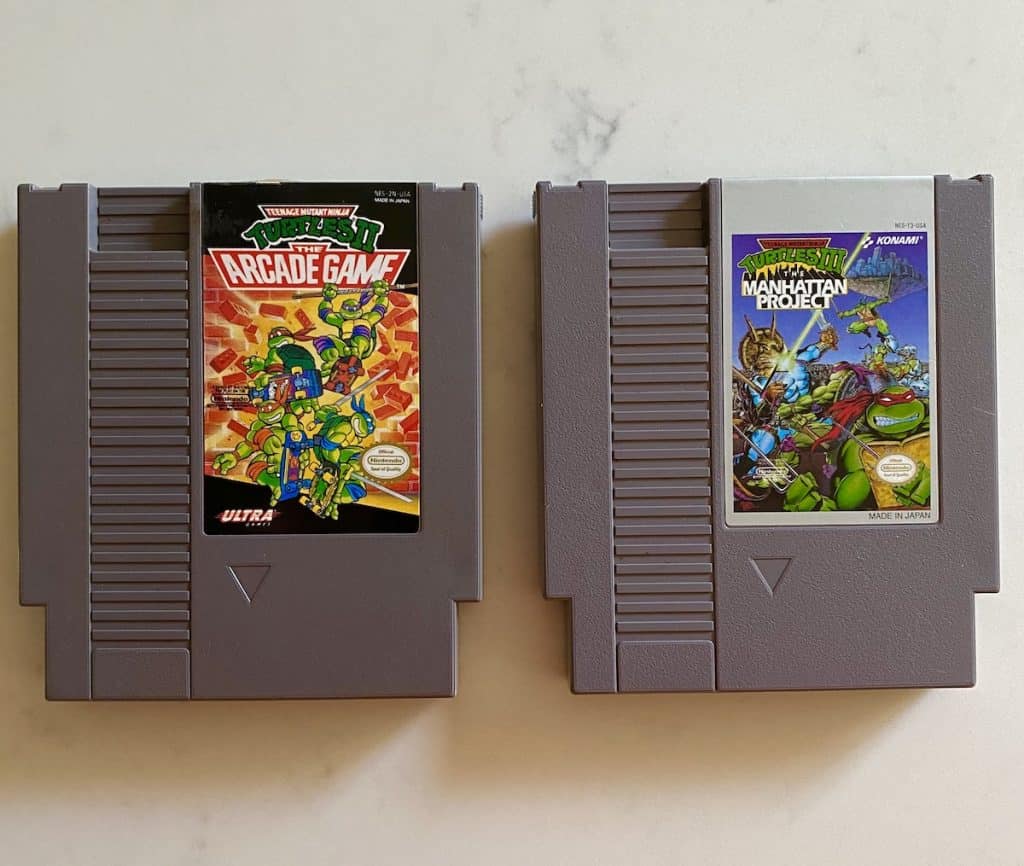
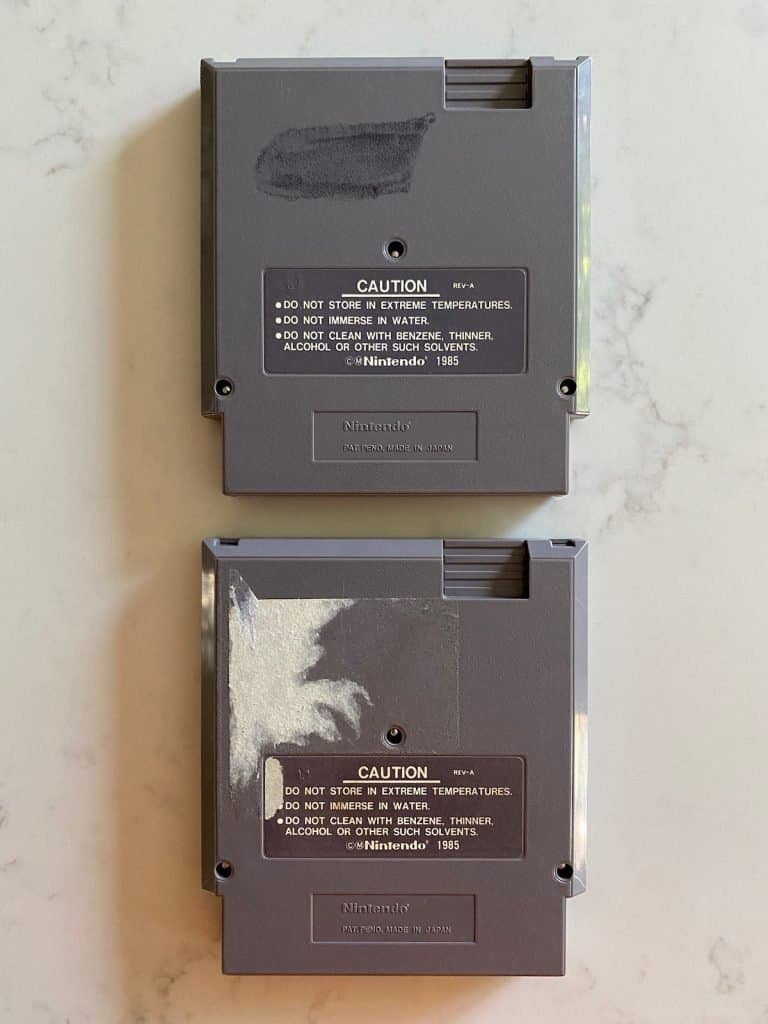
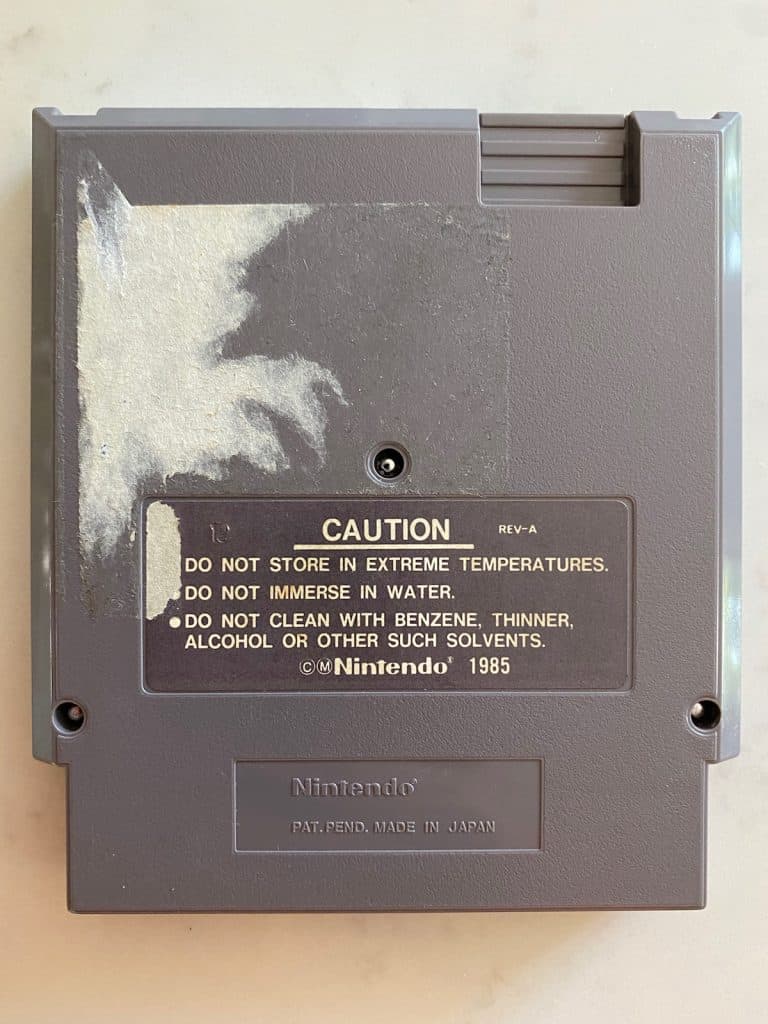
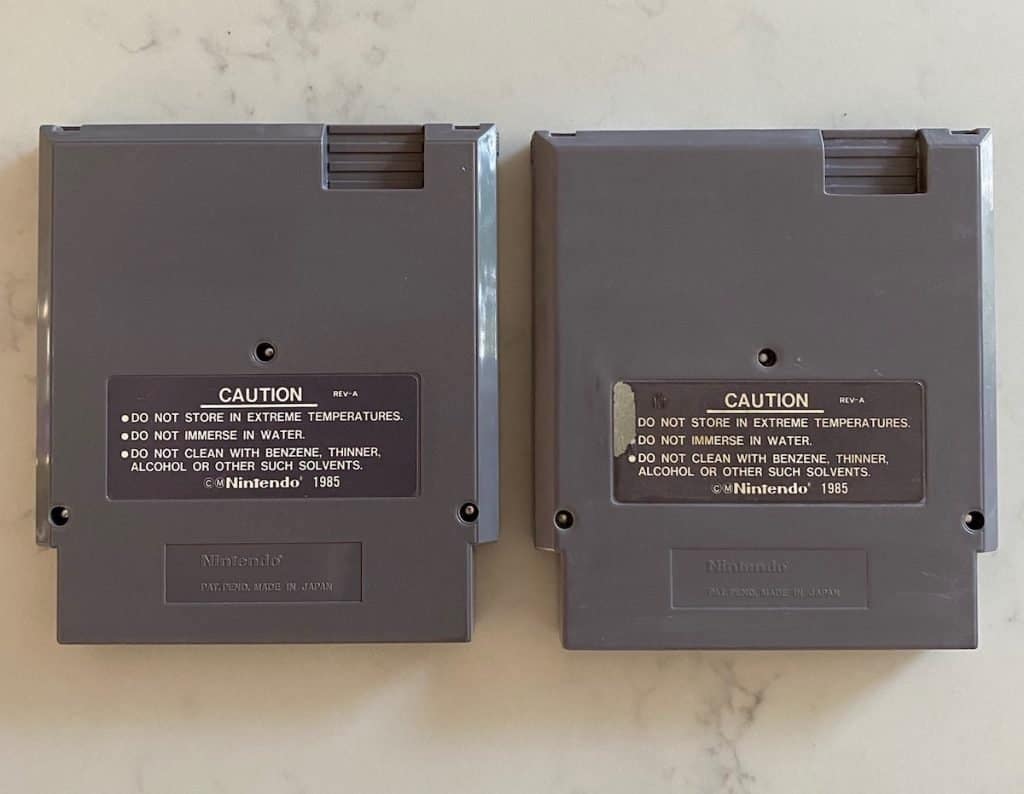
To demonstrate, I recently picked up both Turtles II: The Arcade Game and Turtles III: The Manhattan Project on NES (I’ve got some Turtle mania and NES nostalgia right now-I also just found Hyperstone Heist and Fall of the Foot Clan!). Both carts were in good enough shape on the front label, but the cartridge contacts were disgusting. There was permanent marker on the back of one Turtles II, and a huge sticker on Turtles III. So let’s walk through how I cleaned these bad boys-I documented it best I could with photos!
Before buying…
I would strongly recommend looking for carts that generally have a fairly clean/minty label, even if the rest of the cartridge is a disaster. There’s not a lot you can do to fix up the label in a safe way that maintains its integrity, and that’s probably the most nostalgic part of the cart anyway. (if you’re buying on eBay and need more pictures, ask the seller!). Check out the front and back of the Turtles carts I just bought:
Don’t worry, we can fix this! Let’s get to work…
Damp paper towels work wonders
I always start cleaning with a slightly damp paper towel. Lots of small blemishes that look like stains are actually just dirt and other debris caked on to the cart! They come off easily with just a little bit of muscle. Be sure you don’t soak the paper towel, as water will be squeezed out and potentially run into your cartridge label.

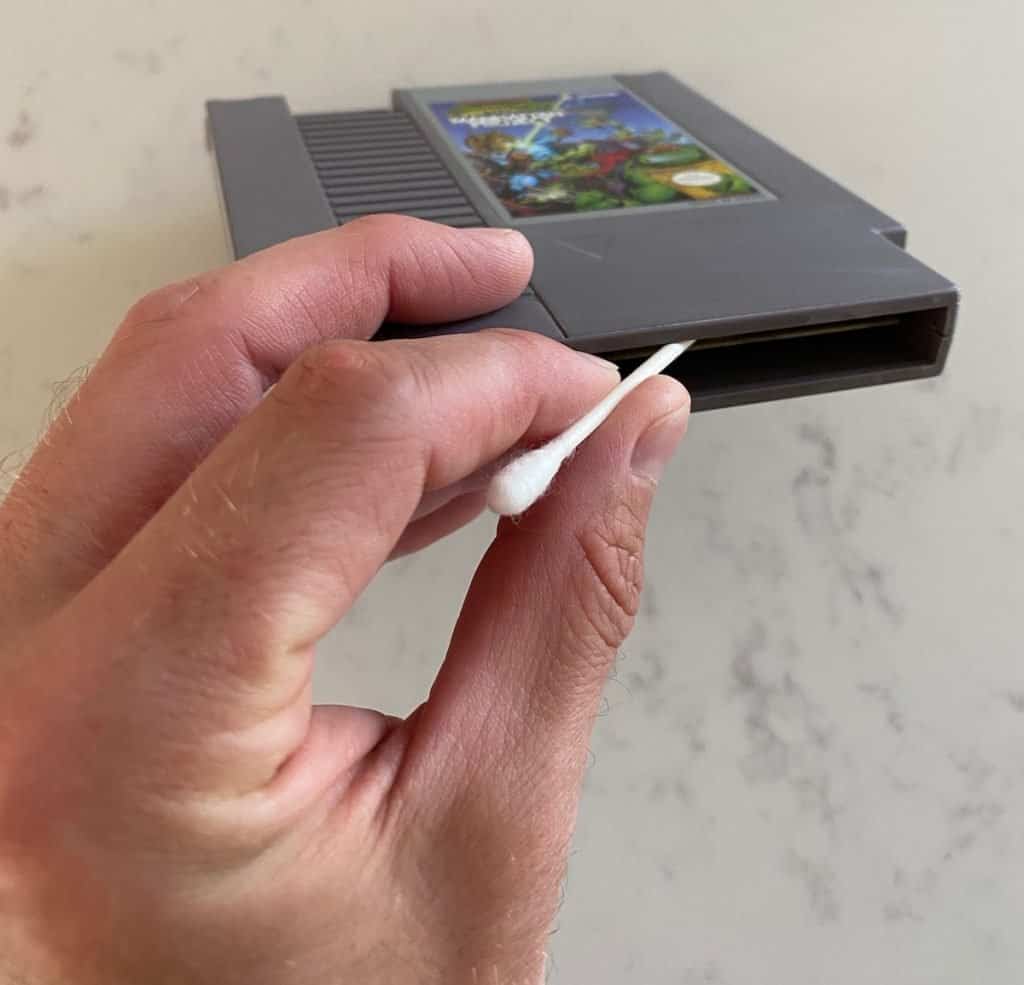
A wet Q-tip also works great for cleaning crevices or grooves where screws are! And speaking of which…
Q-tips and cartridge connectors: a perfect match
Q-tips are a must when cleaning game cartridges! They’re how you safely get at the small space where the cartridge connector is. The “traditional” advice here is to use isopropyl alcohol to clean the cartridge connector. I have another recommendation for that, but alcohol is great for cleaning around it! Take a look at my Turtles II cart before I started:
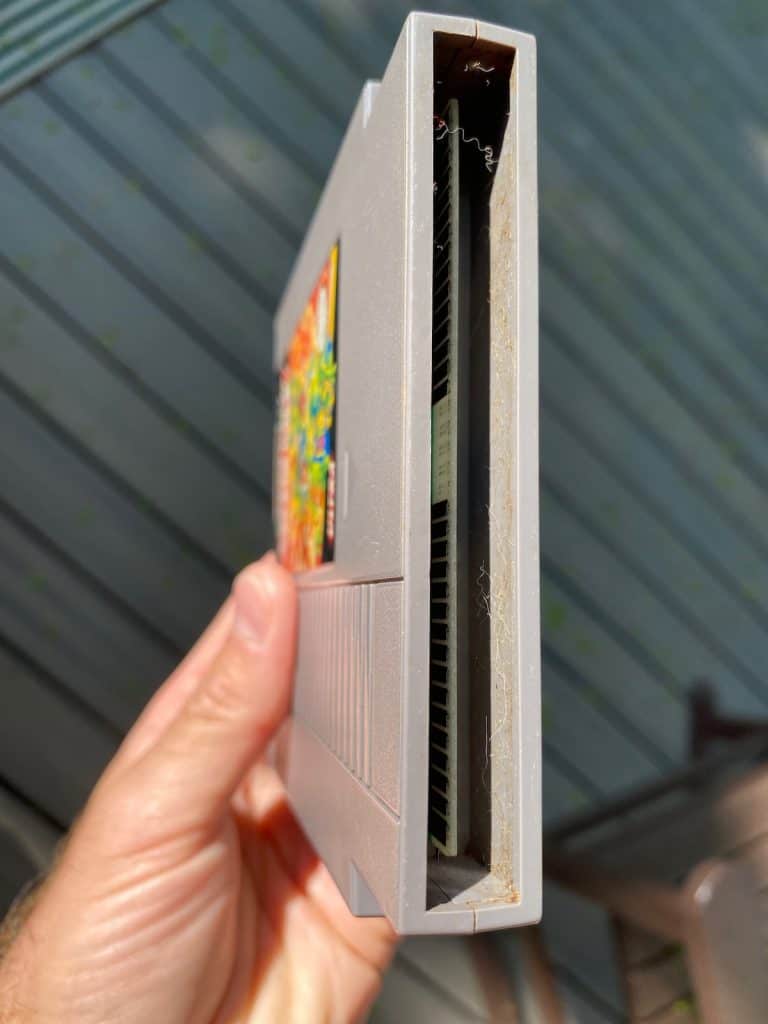
And after just two Q-tips worth of scrubbing with some rubbing alcohol, it’s a night and day difference!

Now for the cartridge connector itself. I personally recommend WD-40 over alcohol! This is a tip I got from the excellent NES Complex on YouTube, who has a massive collection of NES titles. Alcohol will require re-application as time goes on, but WD-40 is essentially good for life once applied. I cleaned all my carts with it when I learned the tip nearly a decade ago, and I haven’t had to do it a single time again since.
A quick word of caution, courtesy of my best friend Kamal (see the comments below!). WD-40 does contain more chemicals than alcohol, which over time might cause some problems with delicate electronics. I wouldn’t recommend WD-40 on the main board of a game, but it’s worked wonders on the connectors for me. As I stated, I’ve been using this technique for many years and my entire collection works perfectly to this day!
“Permanent” marker, you say?
Here’s where things start to get a bit trickier. If you’re going to remove marker from a cart, you’re going to have to use something that’s at least mildly abrasive. Some folks like to keep their carts absolutely, 100% pristine to original form, and if that’s you, there’s not much you can do about the marker. But if you’re okay with some slight abrasion, I’ve got a solution for you:
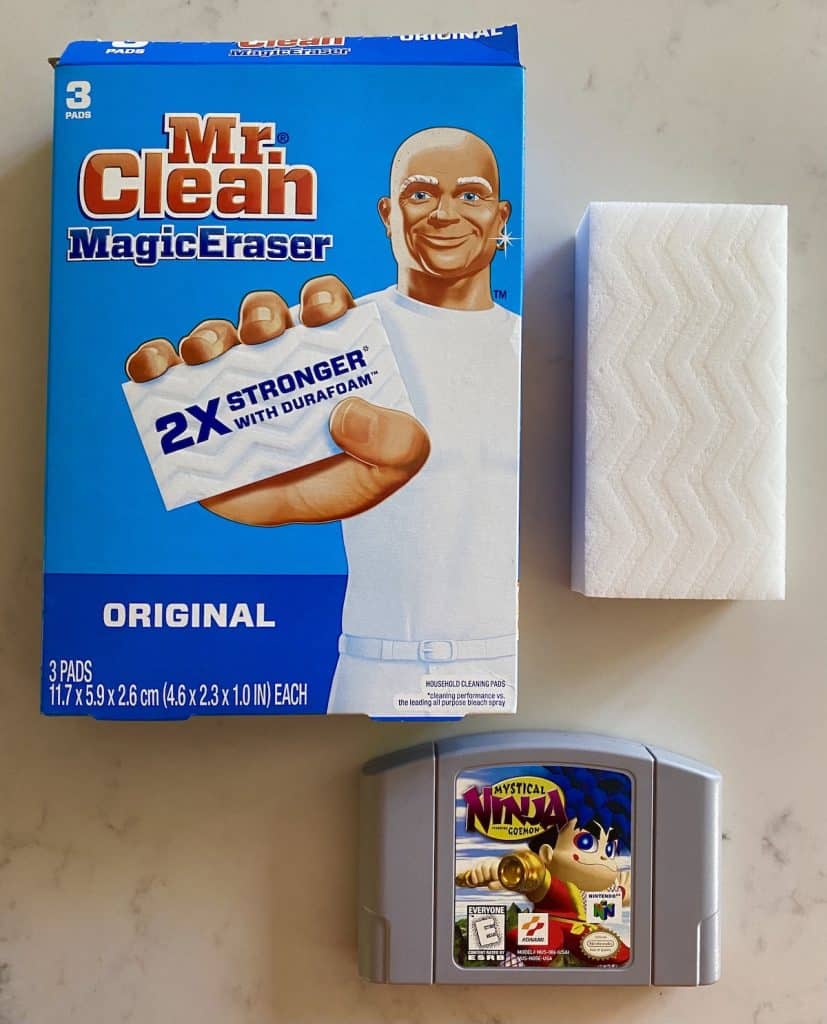
Why are both Mr. Clean and Mystical Ninja in that photo? Well, aside from it being an amazing crossover idea we’ll probably never see, Magic Erasers are how I cleaned all the marker off that cart! I bought this copy of Mystical Ninja for the N64 from Blockbuster back in the day for only $10. But it was covered in marker! Writing on the top (no top labels on N64 carts made it tough for Blockbuster employees to find the right game) and down one side. A few minutes with a magic eraser and it looked brand new!
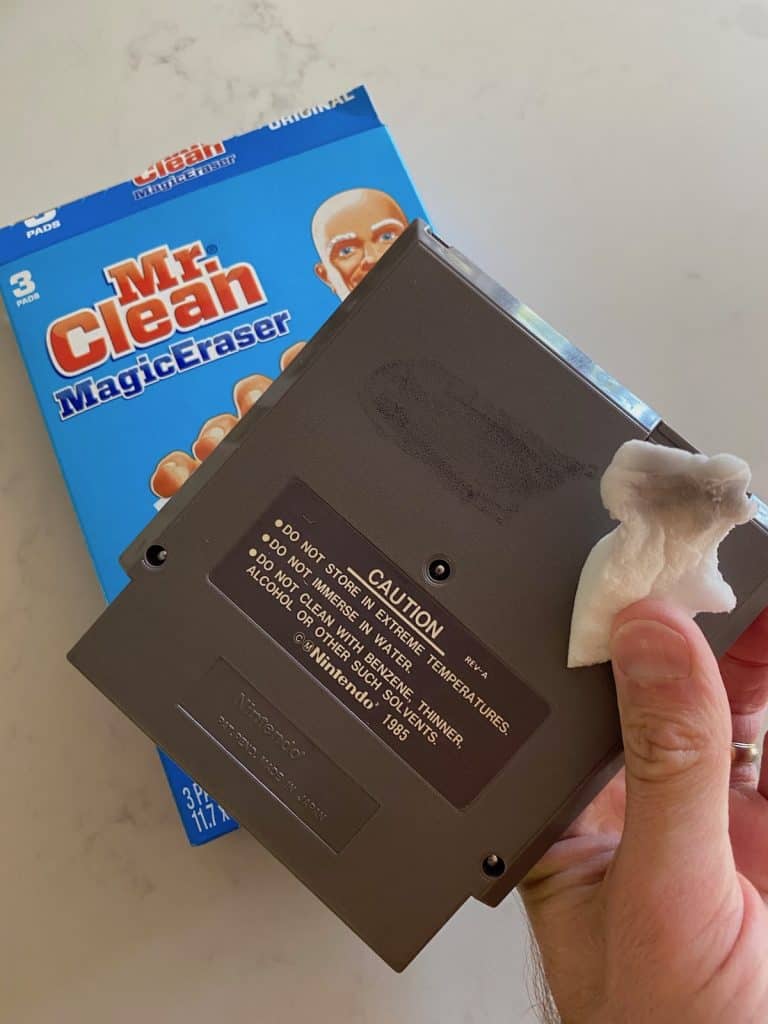
What I’ve found is that the ease of marker removal is directly related to how long it’s been on the cart. If it’s fairly new, it shouldn’t take long at all, and you’ll barely notice any abrasion on your cart. But for much older carts, like my Turtles II, you’ll need some time and serious scrubbing! You may want to consider leaving ancient marker on, like I did for my copy of Metroid II I got from a friend whose name is still on the back today. Here’s the progress I made over the course of five minutes of Magic Eraser-ing on my Turtles II cart:
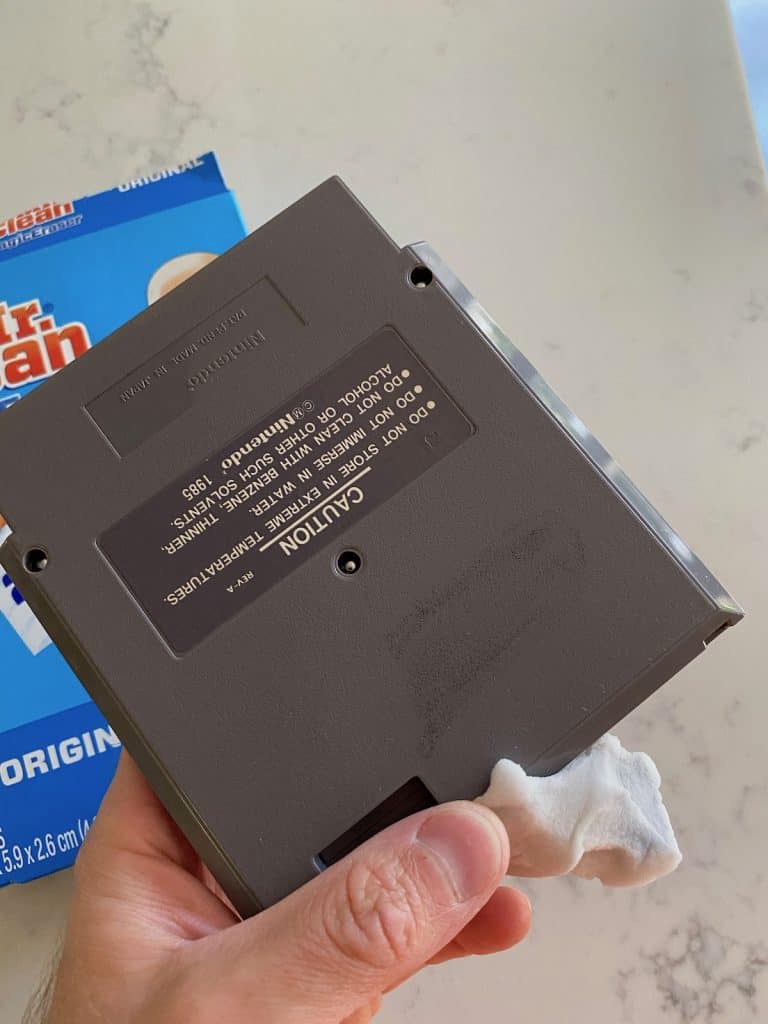
I personally prefer a cleaner looking cart even with the mild abrasion. Just be aware it does take some endurance to get that old marker off (cleaning old game cartridges seriously gives Wii Fit and Ring Fit Adventure a run for their money), and there’s a *bit* of wear off the cart!
Stickers-the bane of my existence
This is where cleaning game cartridges goes from “normal” to “expert”! Stickers are, by far, the hardest thing to effectively and safely clean off of a cart. Case in point-the back of my Turtles III cartridge:
I want to walk you through how I think about tackling stickers, and make a few suggestions.
1. Consider leaving the sticker on
If you’re very clean like me, this may sound like heresy. But some stickers, like price tags, are actually fun throwbacks to bygone eras. Old retro shop and rental label stickers are especially pretty nostalgic for me, so I end keeping a lot of those!
If you want to remove a sticker, understand that it’s going to take time, and it’s possible you may end up doing more harm than good! Similar to marker, how “badly” they’re stuck relates to how long they’ve on the cart. A good rule of thumb to follow is if a sticker is 20+ years old, it’s probably best to leave it alone. I wanted to try on my Turtles III cart since it only had a sad, ugly, remnant of an old sticker, but it’s ultimately up to you!
2. Peel as much as you can before using a solution
If you’re hellbent on removing a difficult sticker (because you’re crazy like me), it’s time to proceed with caution! It’s imperative to get as much sticker off as you can before you use any solution. Without taking this step, you’ll be left with a massive sticky mess that’s much harder to remove, and spread over a greater area! Generally I’d suggest using a combination of careful peeling with fingernails, interspersed with bursts of a hair dryer for bursts of 20 seconds or so to help soften the glue. You’re not going for perfection here-just removing as much of the physical sticker as possible so that you have mostly “residue” left.
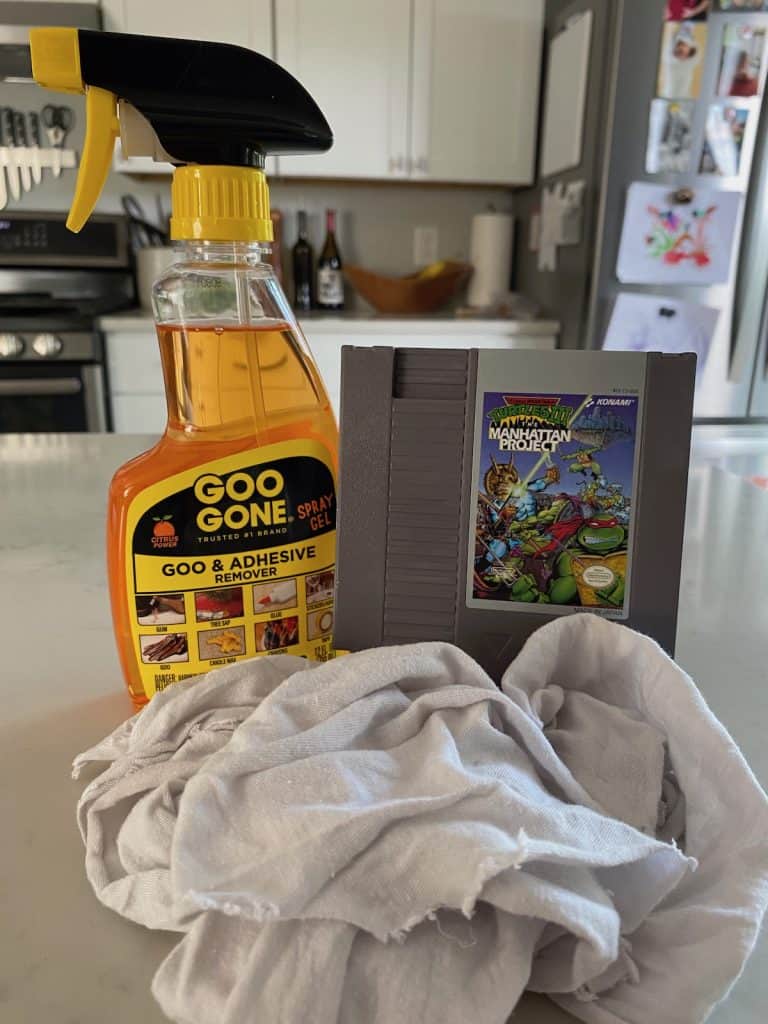
3. Use “Goo Gone” with a clean white rag, CAREFULLY!
To get at the remaining residue, I strongly recommend Goo Gone. I haven’t found any other products even close to as effective as it is. Know that it is mildly abrasive, so with lots of scrubbing you can again wear away some of the cart surface!
Stick to (ha!) the instructions on the Goo Gone bottle-for the Turtles sticker I let it soak for quite a bit before wiping. Stay nearby to carefully monitor because you don’t want the solution to bleed into your labels!
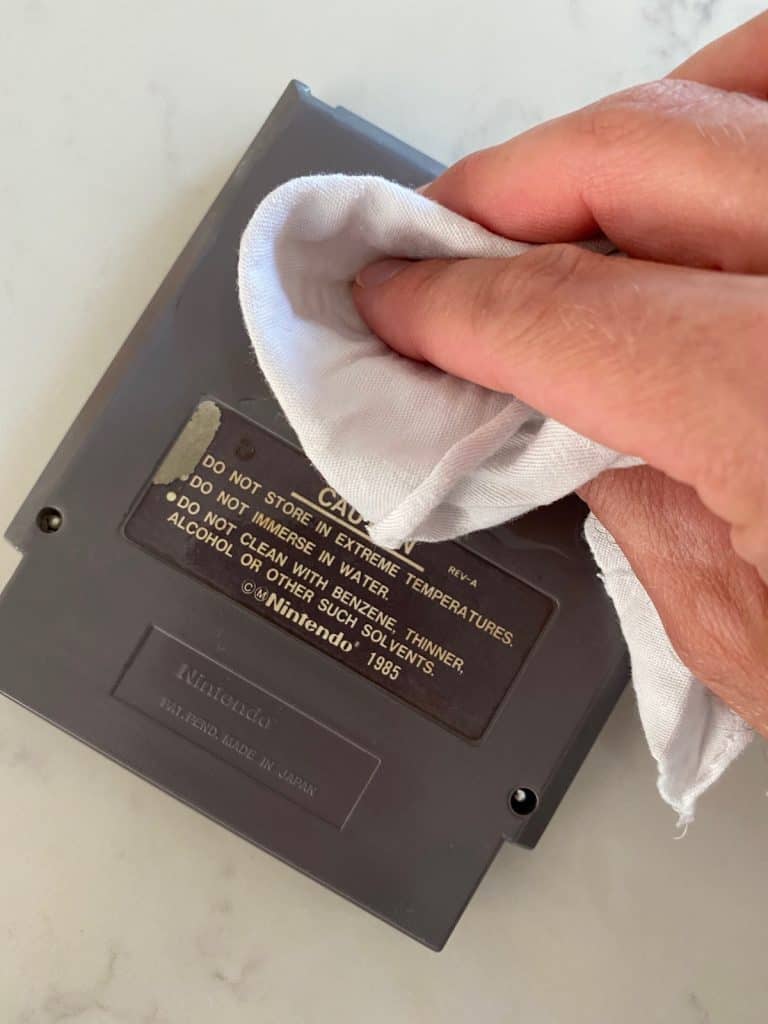
Afterwards, wipe the surface clean with a damp paper towel (or other rag) to remove the remaining solution. For really tough residue, you might need another round of application! I certainly did with the Turtles III cart.

As good as new?
I think both carts came out looking great! They’re not perfect-you can definitely notice some wearing away of the surface on the back of the Turtles III cart (right). But in my humble opinion, it’s a big improvement.
I hope these tips for cleaning game cartridges help you better maintain your collection and potentially add a few “diamonds in the rough” you can fix up. Take good care of your collection-it’s pretty inexpensive and adds an extra level of pride to the games you own!
Have you had success with any of these suggestions? What other tips for cleaning game cartridges would you advise? Let me know in the comments below!
Permanent marker will come off easily without something abrasive. Take a dry erase marker and color over/trace the name or whatever is written. Then wipe with a cloth or paper towel. Repeat if needed.
This will work with marker on a label as well. No need for a magic eraser.
This is an awesome tip! Definitely giving this a go next time. Thank you for sharing!
Good tip re the dry erase marker.
I’ve found that Eucalyptus oil works wonders removing recalcitrant sticker residue from books. It might be worth a try on something you’re happy experimenting on, even if that something isn’t a game.
Thanks for the tip! Also “the recalcitrant sticker” would be an excellent name for a guidebook about cleaning retro games 🙂
I know cleaning old marker/stickers off of things is a nightmare. (As a little kid most of my toys came from a thrift store) I remember wanting to make them look like they just came out of the box. But most of the time, it ended tragically. Thanks for the tips. Maybe if I can get my hands on some games at the local pawnshop, these tips will be a life saver.
Oh I hear you. I’ve lost many a battle against obnoxious stickers on all kinds of collectibles. Hope this helps to at least some extent, and good luck with the search at your local shops!
You can do it watchhawk – we believe in you! Patience and “being ok” with some amount of sticker will go a long way.
This Summer, if I can just make a little bit of money, I may be able to begin game collecting, (I have my eyes set upon a SMB/Duck Hunt cart at the pawn shop) the games there look ridicoulsly old, so these tips will help me get them almost brand new looking. Thanks Zach and Kamal.
Of course, my friend. I hope all goes well and you’re able to pick up a few games soon! SMB/Duck Hunt is a great start-that’s what came with my NES I got for Christmas when I was in first grade! (speaking of which, I’m working on an NES nostalgia post for the near future). Best of luck with everything!
The Dreamcast invokes a lot of memories. September 9th is usually the trigger for me (9/9/99, you just had to be there!).
But yes Gamerz and any mom and pop game store deserve our hard earned dollars. Shop local folks!
The Dreamcast in svideo looks beautiful (given the right display).
I’ll eventually purchase Xenocrisis I _think_ on the DC just because the controller lends itself better to a twin stick shooter more so than the genesis pad. Again, the face we’re able to discuss buying new games for 20+, 30+ year old systems is a dream come true.
True story on all fronts! Maybe I’ll plan some DC posts around 9/9 this year :). And Xenocrisis looks amazing-I had no idea it was available on so many platforms. Amazing!
Maybe someone will finish Castlevania: Resurrection at some point-I’m sure Konami would have no problem with that!
Nice pickups with TMNT II & III 😃
Is WD-40 really safe though?
I know for high concentrate isopropyl alcohol, it dries out immediately so you’re effectively just applying a tiny amount of water which will all evaporate quickly. WD-40 contains petroleum and other chemicals that could eat away at the pins or plastics over time?
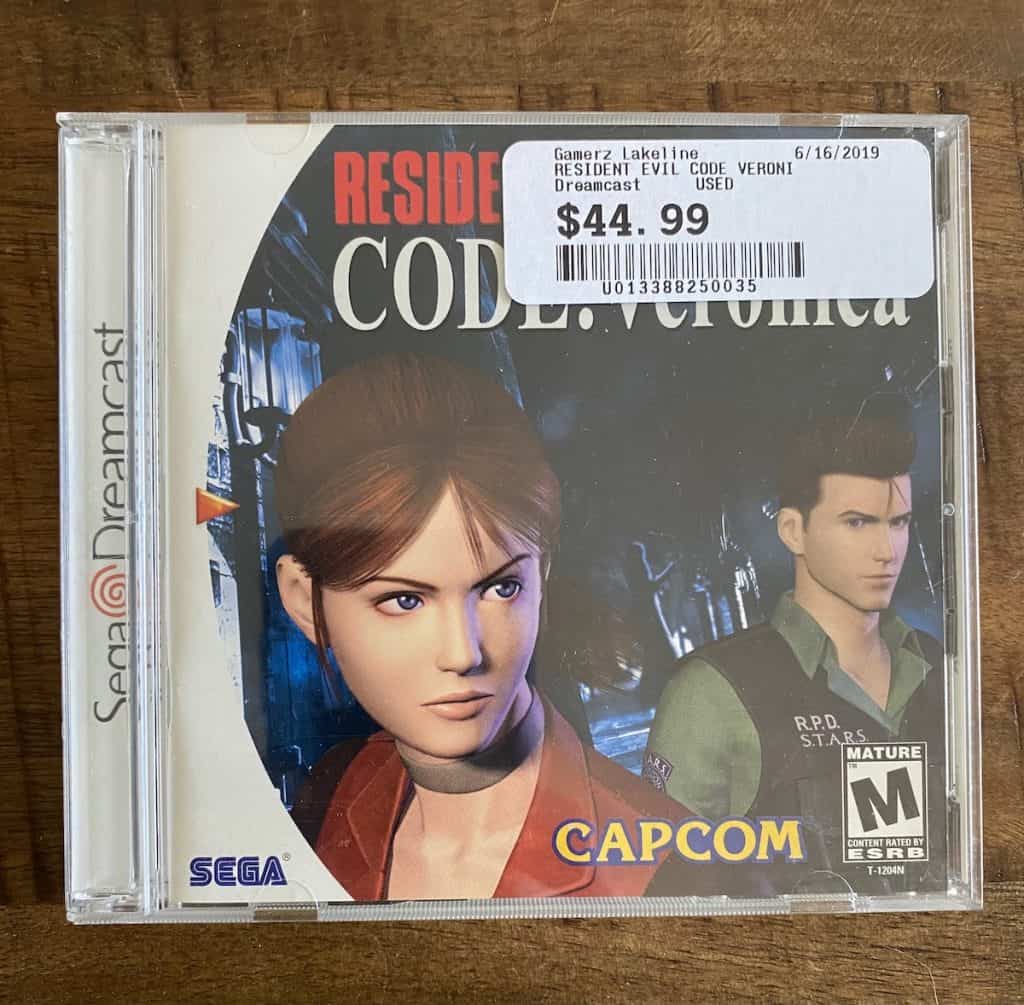
Seeing the Gamerz sticker (RIP) makes me happy. And it’s a Dreamcast game. And it’s a Resident Evil game. What isn’t there to love here?
Finding “diamonds in the rough” is essential to pragmatic game collecting. It’s at the very least good “gaming hygiene” to help preserve and maintain everything. Great post!
And I think Konami has a case against Mr Clean for copyright infringement 🧼 🧽
Great question and thanks for the heads up! I added a word of caution to the post-I wouldn’t recommend it for the boards themselves, but I’ve seen zero degradation of my pins or plastics in the many years I’ve been using the technique. Everything still works beautifully in my own collection, but then again, with prices being insane right now, “better safe than sorry” may be the right philosophy!
And gosh, just pulling out that copy of RE Code Veronica brings a rush of memories. I had a blast at Gamerz the few times I was able to go with you, and my girls did too! Really makes me want to start talking about the Dreamcast on Chozo Project soon. I mean, I’ve been on a Sega kick, so it seems like the time is ripe :).
Also, when is HD Retrovision going to release their mythical Dreamcast component cables??